Thursday, November 30, 2006

The longblock returns

I picked up the rebuilt longblock from Mauricio Velasquez, who sourced the machine work and did the final assembly. Mauricio runs Jomag, an aircooled VW shop in the Silver Lake district of Los Angeles. Back in the day he had a nice moss green Cal-Look Notchback that got covered in the VW press and placed in the local shows, so he's fluent in Type 3. If you live on the eastside of L.A. and need a fair and honest mechanic for your aircooled or watercooled VW, give Mauricio a call.


In the end it turned out there was no obvious cause for the sudden compression loss, just wear and tear and probably a case stud or two that let go just enough to cause trouble. Just about everything was salvageable. The case was align-bored and case savers were installed. It turned out to be a routine overhaul.


The original '62 311101301A cylinders were put back into service. My original plan had been to move up to 85.5mm pistons and cylinders because I assumed the old ones would be too far gone, but it turned out that they were within the wear limits, so I decided to reuse them since they've always been with the car. There must be only a handful of cars out there that are still running on these early cylinders. One piston ended up having a hairline crack and had to be replaced, but luckily I was able to find an NOS 83mm 1500 Kolbenschmidt piston in the Samba classifieds from seller Bob Sepulveda.


I was worried that the heads might be cracked, but they came back from the machine shop with a clean bill of health and looking new. What a relief. We were even able to keep the long rocker studs. You really know you've got a 1500 when you set the valves at .008".

Now the final reassembly can begin.

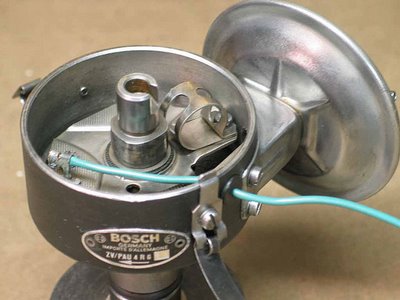
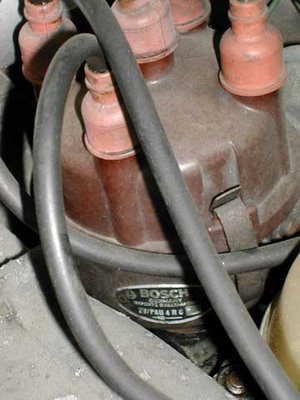
Bosch ZV/PAU 4 R 6

If you have an old Bosch cast iron distributor and it needs a rebuild you call Glenn Ring. That's all you need to know.


Wednesday, November 29, 2006

Heat exchanger restoration

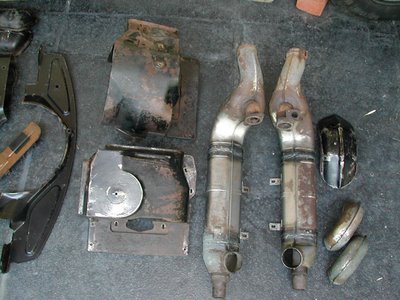
The Ghia's heat exchangers were in surprisingly good condition after 44 years of use. All the grease and grime that had been allowed to build up on them over the years protected them very well from rust. Here they are just after being removed from the engine, with the lower cooling tin still attached:


The small pieces of tin at the right and left were only used through the 1963 model year. They had been installed on the wrong sides as shown here. A broken mounting tab on the right heat exchanger had to be rebrazed before ceramic coating.


The heat exchangers had collected a lot of debris blown in from the fan housing over time. I pulled out a lot of junk including cardboard, feathers, insulation from the engine trapdoor, and even a metal intake manifold gasket. Next I had to strip the exchangers down and degrease them.
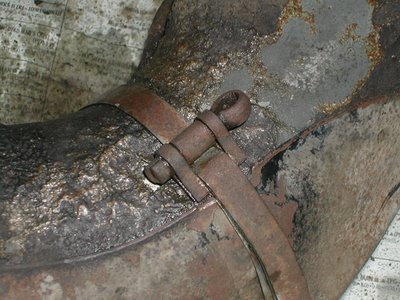


I made note of the way the stone shields were attached before taking them off.


I knew early heat exchangers had sprayed-on insulation (the more familiar asbestos wrap was introduced in April 1963), but as the grease came off I was surprised to see that what was left of it was a metallic gold color.


Here's a sample of the sprayed coating that I saved. It's about 1mm thick and flexible. I'm sure it's mostly asbestos. The dust from this stuff is not something you'd want to be breathing in. I did some research on substitutes for the coating and settled on Lizard Skin ceramic insulation. It's not cheap but it has properties that make it a good choice for the job: good heat and sound insulation, withstands temperatures to 500°F, water based and non-toxic. I applied it with a brush over ISP West's ceramic coating, recreating the original texture, and then gave it several coats of engine enamel. I considered painting the insulation gold like the original, but the only hi-temp gold paint I could find had a little too much 24-carat bling for me, so I settled for gray:


The next job was to reinstall the freshly powder-coated stone shields. NOS straps were sourced from BerT3 in Belgium. I considered buying bulk strapping from a source like McMaster-Carr (a highly recommended source for industrial supplies), but when I added it all up Bert's NOS straps cost only a little more. Always use NOS parts when practical! Here's the installation procedure:


Position the shield and straps loosely. VW put the clamps inboard.


This detail shows the way the straps should be threaded. The strap wraps around the heat exchanger once, threads through the rectangular hole on the clamp, then wraps around a second time and threads through the cotter key. Pull in the slack and then trim off some of the excess strapping. Then tighten the key with a screwdriver a half turn at a time, stopping to adjust the strap and reposition as necessary as you go.


Here's a shield clamped in place.


And both finished heat exchangers ready to install.

Sunday, November 26, 2006

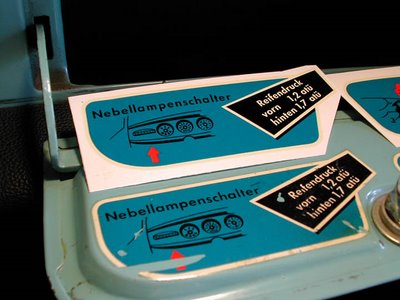
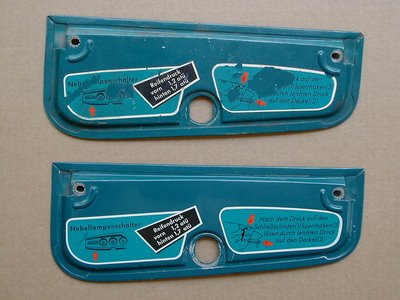
Decals for 1962–63 1500 Ghias

This summer I finally got around to making reproductions of the water transfer decals found in the glove box and engine area of early 1500 Ghias. A member of the Type 34 Registry, Paul Stone, had made reproduction stickers a few years back, but they were self-adhesive stickers, not water transfers, and while he made a good attempt at recreating the artwork I didn't think they were as accurate as they could be. I wanted to make water transfers that were exactly like the original ones. I created new artwork and after a lot of looking found a silkscreen print shop that was willing to do a short run of water transfers. Here's how they turned out:


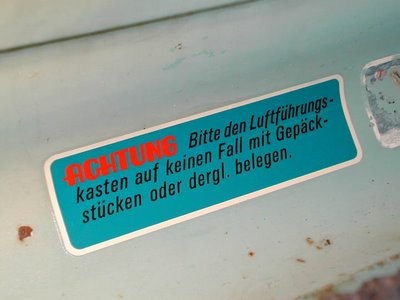
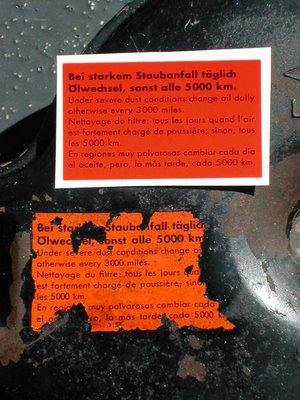
I also decided to reproduce the decal used on early Type 3 air cleaners made by the OEM supplier Knecht.


Thanks to Paul Colbert and Lee Hedges for their advice and encouragement on the decal project.

Fuel pump rebuild

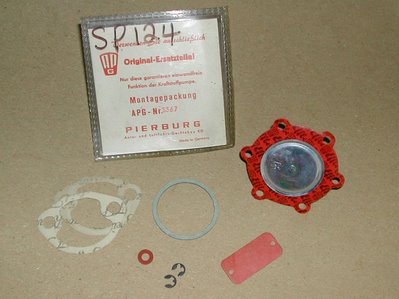
With the engine out of the garage I took the opportunity to rebuild the fuel pump. When I bought the car it had a Brazilian aftermarket pump fitted, but I had a OEM Pierburg fuel pump left over from my '65 Squareback restoration. I also had an old stock Pierburg Type 3 rebuild kit on hand.


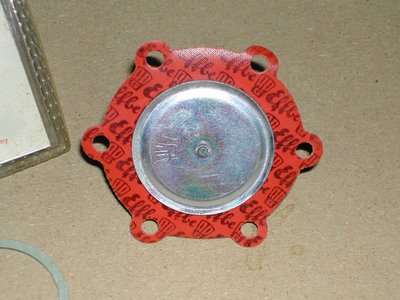
I really like that fancy Pierburg diaphragm material.


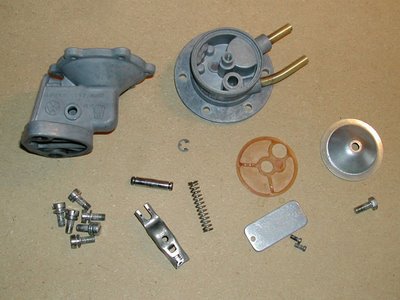
The fuel pump parts cleaned up nicely.


Here's the reassembled pump with the plastic cover in place. I set the pump aside and moved on to other projects, but a week or two later there was a discussion on the vwtype3.org mailing list about how far to depress the pump actuating lever when tightening the diaphragm cover plate screws. Tightening the cover screws with the lever in the wrong position would put more stress on the diaphragm than it was designed for, which would eventually tear it. VW had a special tool for setting it (of course), but the consensus on the list was that the lever should be depressed 14mm. I made a simple jig and retightened the cover plate at the right setting. I may have dodged a bullet there thanks to the vwtype3.org list.

Clean, but not clean enough

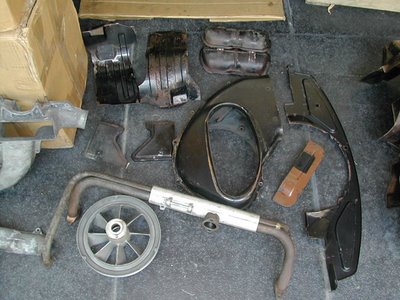
Freshly cleaned parts ready to be sent out. The heat exchangers and elbows got ceramic coated; the engine tin got straightened, repaired and powder coated; the fan housing and pulley got sandblasted; and the intake manifold had a broken braze rebrazed. I had all this done through ISP West.


People's dream car, December 1961


The new VW 1500 Ghia featured on the cover of the German equivalent of Popular Mechanics. The photo and headline sum it all up: high style for the aspirational middle class.

Saturday, November 25, 2006

Engine dissection

I got the engine out and tore it down to the long block with help from Jonny Lieberman. Jonny has decided to chronicle my progress as a serial feature on Jalopnik, the notorious car blog he contributes to. My Ghia's 15 minutes of fame. Sorry Jonny, but it's gonna be a few months between installments!

Here are some more early 1500 characteristics:


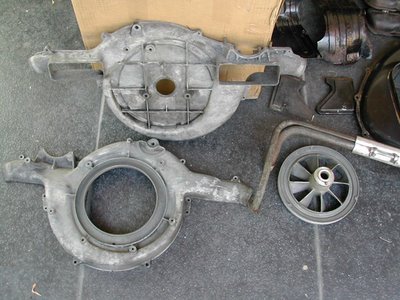
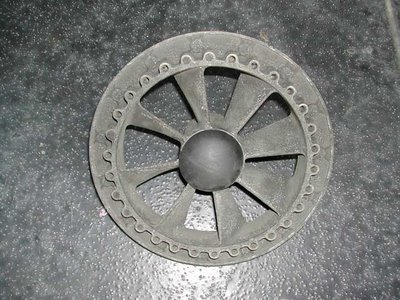
This large diameter pulley was used from the beginning of production until December 1962. The diameter was changed to reduce the speed of the generator.


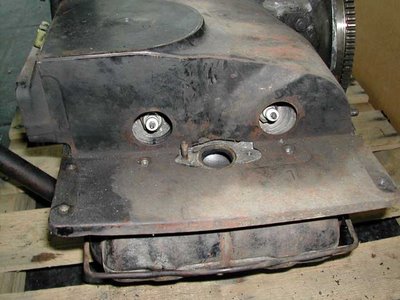
This early fan housing looks like any Type 3 fan housing at first glance, but a closer look reveals no thermostat flaps or linkage. VW didn't add a thermostat to the Type 3 engine until August '63.


Right side cooling tin used through August '62.


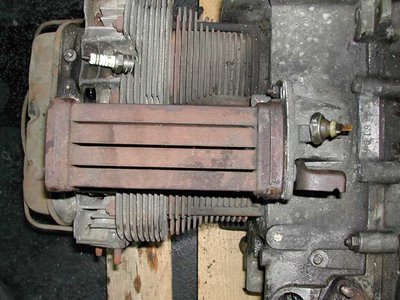
Left side tin through August '62. The nut near the top between the plugs is a mount for the oil cooler.


With the left side tin removed the oil cooler is visible. The early Type 3 engine used a cooler that's almost identical to the Beetle cooler except for the added mounting stud on the left side that's visible in the previous image. The cooler is attached to the case via an intermediate bracket that also holds the oil pressure switch and a bracket for the carb return spring. Other than the oil pressure switch these parts were all discontinued in August '62.


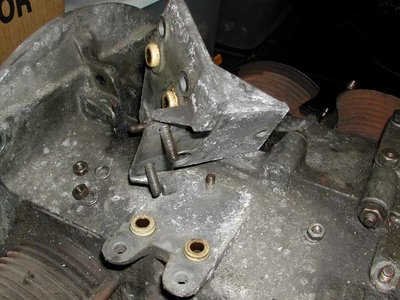
The '62 oil cooler used four Type 1 seals. The good news is they're easy to find; the bad news is that there are four seals that can potentially leak. Here are the first two seals.


And with the bracket removed the other two seals can be seen.


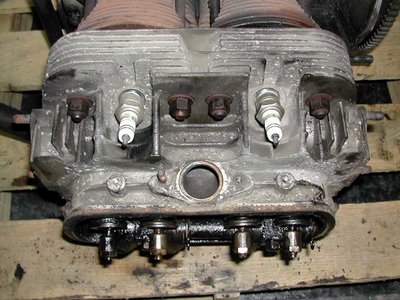
Here's the right side head showing the 90° intake port. I wasn't happy to find a broken fin on #2 (upper left).


That's an early head alright.


With the head removed and turned over the long rocker studs can be seen. On most cars the long rocker studs have been replaced by the later short studs that were introduced in August '64. I'm going to try to keep them, but I may have to replace them with short studs if they give me any trouble.


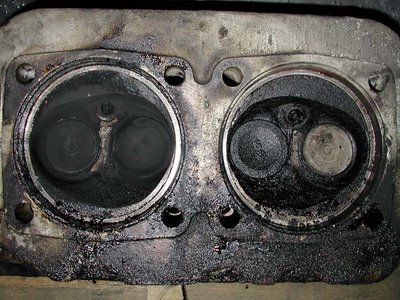
Here are the right side valves. Aside from a lot of sludge and carbon things look surprisingly good. No dropped valve seats (which I expected) or broken valves, and no obvious cracks. Good news, since these heads are really hard to find.


#2 and #1. Again, a lot of carbon but otherwise nothing too bad. I expected to see some obvious damage to #2, but so far nothing. At this point the sudden compression loss was still a mystery.

The long block went off to the machinist, and I had some parts cleaning ahead of me.

Thursday, November 23, 2006

A restoration has to start somewhere...

...and I decided to start my '62 1500 Ghia restoration with the mechanicals. The engine is first on the agenda. The car has been in storage since "something" went wrong in cylinder #2 one night in 2000. Zero compression. Other projects have had to come first, so the Ghia's been waiting for attention since then.

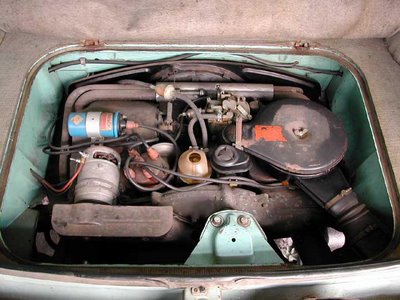
I'm very lucky that the engine is original to the car and it still has almost all of the hard-to-find first-year-only parts. Here's what I started with:


Except for the aftermarket Bosch blue coil almost everything is as it should be for an April 1962 VW 1500 engine. Early Type 3 engines had a number of unique features, and it's not often you find one that hasn't been "improved" by someone along the way.


The original Type 3 engine was essentially a bored and stroked version of the standard VW 40-horse engine with a reconfigured cooling system. As with the 40-horse, the intake manifold joins the heads at a 90° angle. This connection was angled 20° with the beginning of the 1963 model year in August 1962, so the '62 intake manifold and heads are one-year-only parts. The spacer seen above under the heat riser tube (at the top of the photo above) was replaced with a thermostatic valve in August '62 as well.


The Bosch ZV/PAU 4 R 6 distributor is also unique to early 1500s. It's a vacuum-advance cast iron-bodied distributor that's very similar to the one used on the 40-horse at the time, but with a different advance curve. It was used from late 1961 through August 1963.


For a few months in early 1962 the air cleaner had a connection port for a crankcase breather tube but nothing to connect it to. The air cleaners on these transitional cars got a plastic plug to seal off the breather port. Very few of these plugs have survived.


I'll document more odd 1962 1500 features as I tear the engine down. But first things first: it's time for the engine to come out.

Tuesday, November 21, 2006

Auto Motor und Sport road test, May 1962


The 1500 Ghia gets a generally positive review, though they recommend "Porsche tires" (Dunlop SP, Conti Radial or Firestone Phoenix) and Koni shocks for performance-minded drivers.


Nice action shot of an early solid-color car, looking much like the one featured in the original sales brochure.

Monday, November 20, 2006

Spy photos of VW's new models, early 1961


From The Autocar, March 10, 1961. VW leaked these photos to preempt unofficial leaks, but apparently provided no other information. This resulted in some wild speculation on The Autocar's part, including a likely mid-engine powertrain layout and longer wheelbase than the Beetle. A caption notes "a coupé with more curvature of the screen and different front end styling, a possible equivalent of the present Karmann-Ghia model." That part they got right.